New Primo owners experience a lot of epiphanies. They realize how easy they are to light, how quickly they get to temp, how efficiently they burn lump charcoal, how much lump charcoal remains after each use, and of course, how it elevates food! In contrast, the most common initial misconception we hear when we first introduce someone to a Primo is the perception that charcoal grills are thin metal kettles that use briquettes, smell like lighter fluid, and take forever to heat up. We want to eliminate this misconception- you only want to use lump charcoal and never any lighter fluid in a Primo! Briquettes will burn to ash, however, when finished using your Primo, simply close the vents to stop the burn. You will be able to re-use any unburned coals. The photos illustrate charcoal leftover after a 6 hour burn!
Here are a few simple lighting techniques:
As pictured above, we recommend using Primo Quick Lights or the Bernzomatic TS3000KC Self-Igniting Torch to light the Primo. There are also other quick light options including Weber paraffin cubes, the Looftlighter, and other propane torches.
Open the bottom vent completely before you light the grill. Once lit, shut the lid and leave both vents open until you approach your target temperatures.
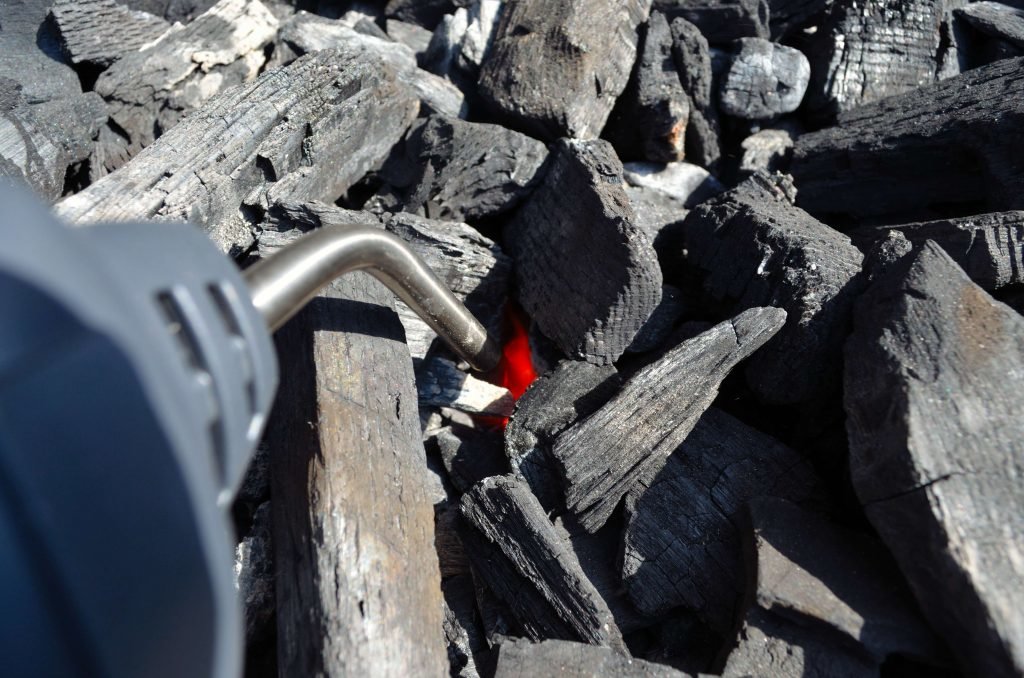
To light with a propane torch, create a small hole in the lump and nestle in the nozzle for 10 seconds or so. Done.
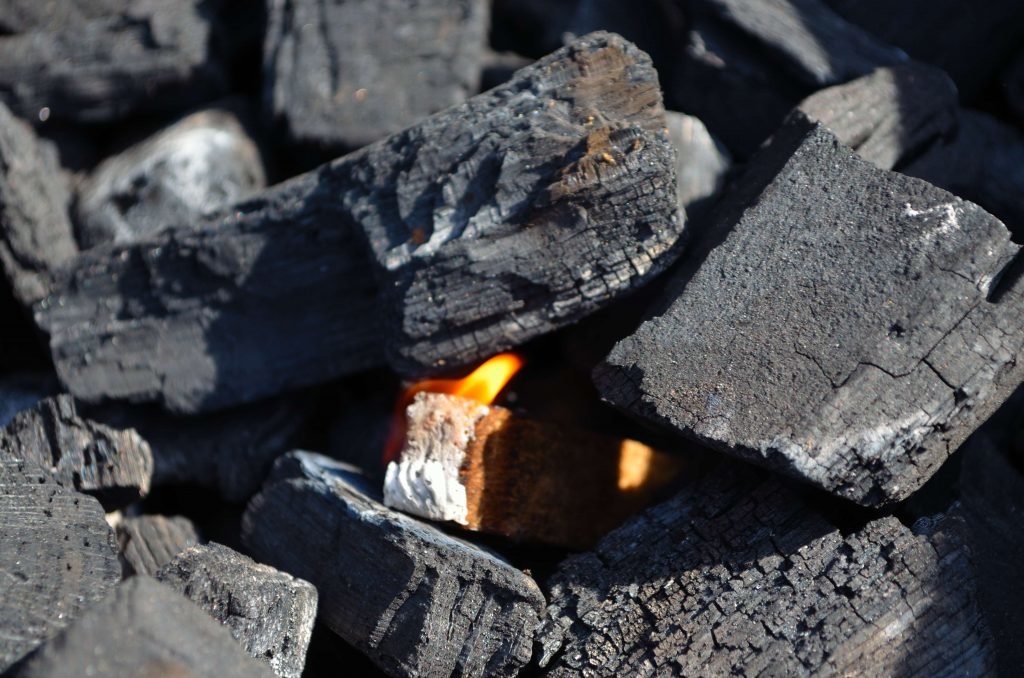
To use a Primo Quick Light simply nestle in a hole and light with a lighter. In a pinch the box comes with a quick strike area but it is much easier to just light with a lighter. Depending on what you are cooking you may want to light the grill in 1 to 4 places, breaking the oval into quadrants.
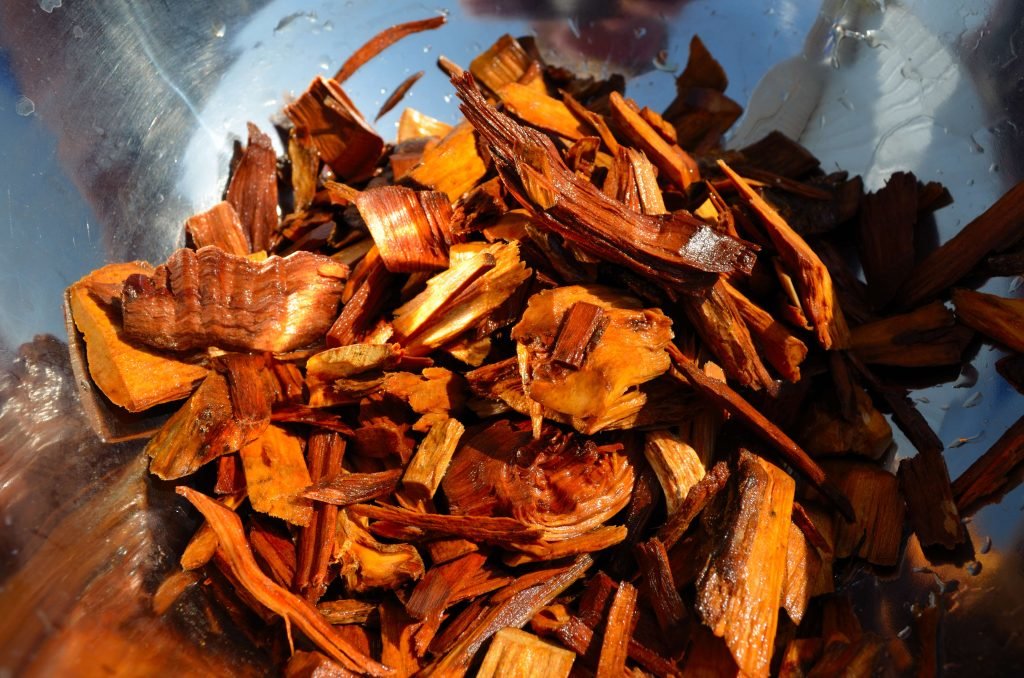
If you are going to grill your food at a higher temperature you can insert the grates immediately after lighting to heat up with the grill. If you are going to smoke your food, leave the grates out after lighting. Make sure you soak your wood chips or chunks for at least a half hour before draining.
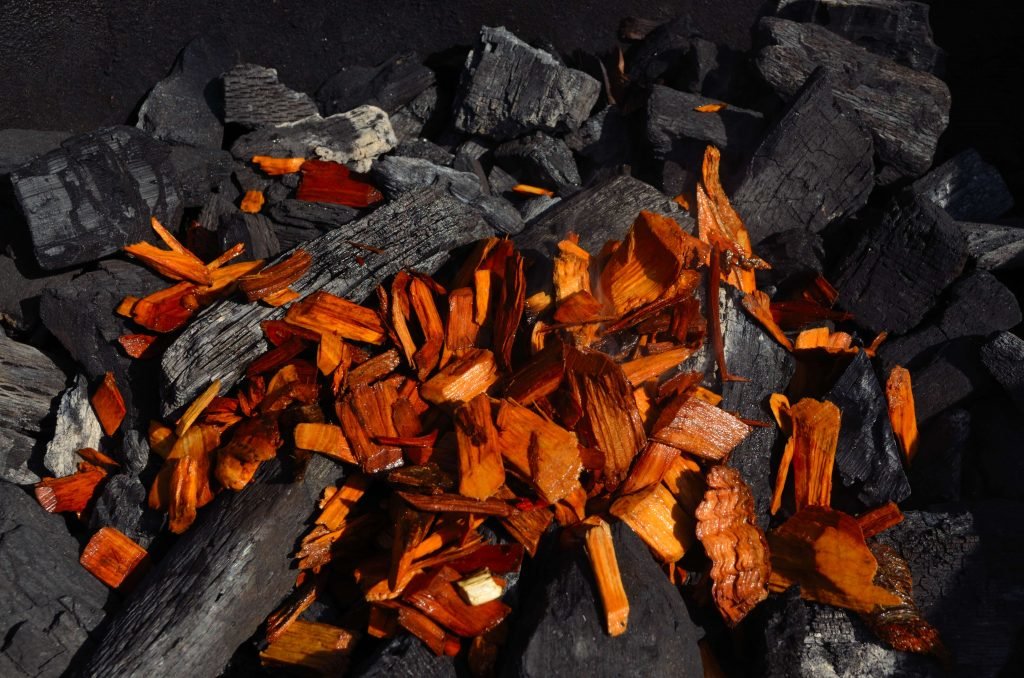
When grill is at or even slightly above your target smoking temp add the soaked wood directly to the coals. Be sure to add the appropriate amount of wood contingent on what you are smoking! We heard the concern about not being able to add more wood easily once everything is in place- simply add enough before you start! A Primo Oval XL can burn for DAYS on a full load of charcoal at 225! Quick true story: for an weekend event we lit a Primo late Friday night to do an overnight smoke on 4 pork butts at 225- the pork finished in the early afternoon on Saturday- we pulled it and put in foil pans. Next, chicken thighs were smoked in the afternoon at 275 and then grill was turned down to 200 to use a warmer for the pans of pork. After a few hours of beverages, we cranked the grill up to cook half a dozen pizzas, one after the other, for the late night crowd. The grill was shut down at that point but fired up the next morning for fried eggs and bacon on the cast iron griddle. All on one load of charcoal.
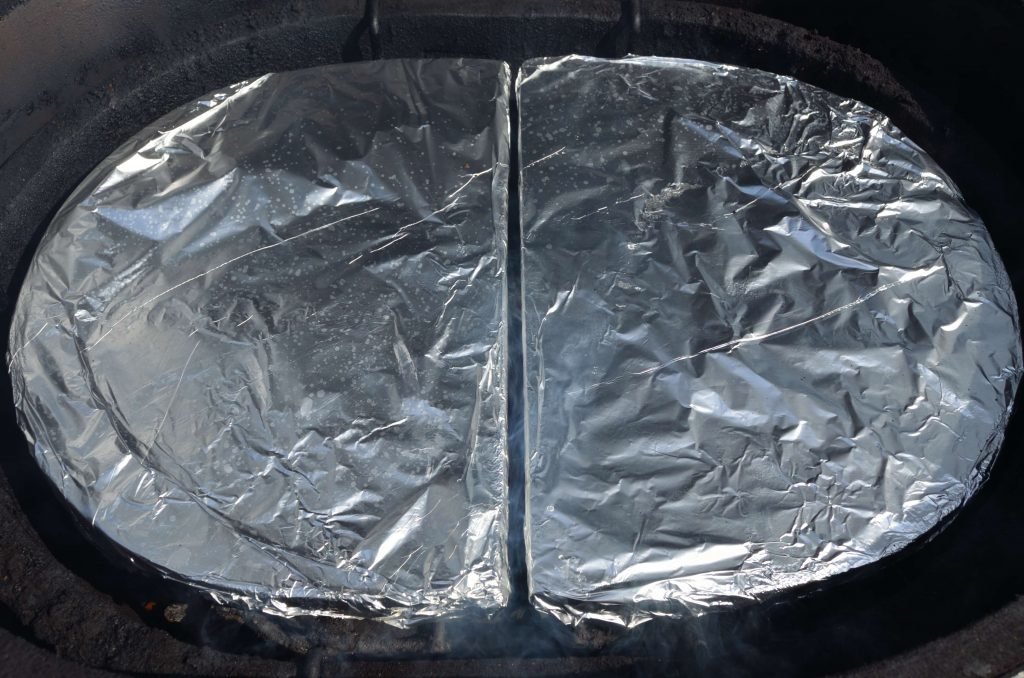
Position the drip pan racks and ceramic d plates over the coals and wood. We highly recommend covering the d plates in foil for easy cleaning. Also, be conscious of their position to make sure there is a gap around them and in the center for good air flow.
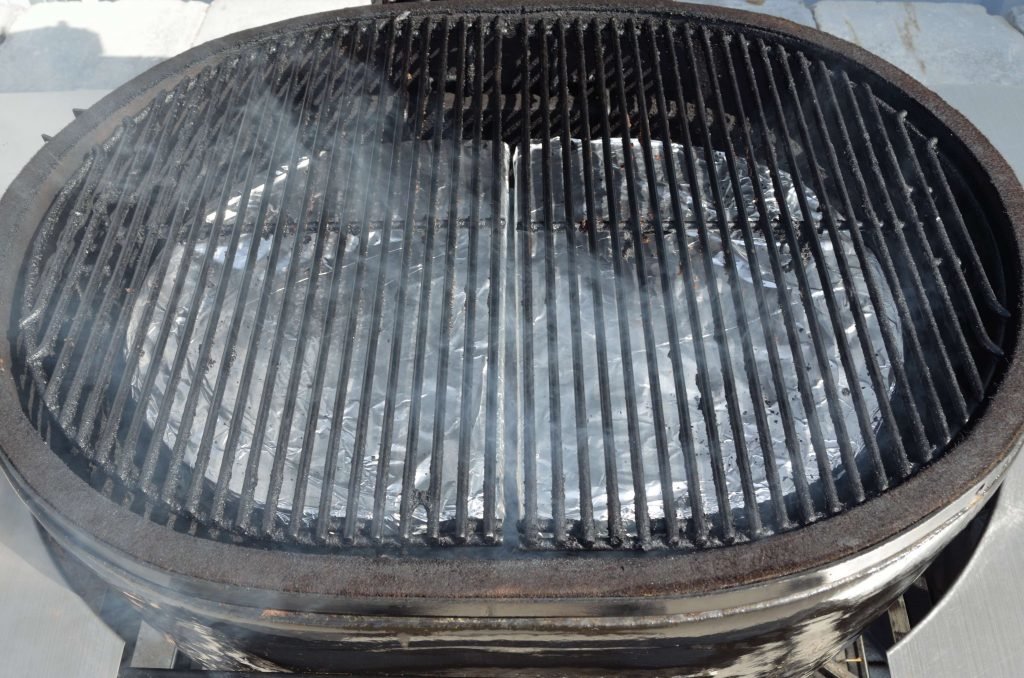
Place the grates and the grill is ready to smoke. The addition of the wet wood, the d plates, and whatever cold meat you put on will significantly drop the temp of the grill. At this point we highly recommend you position dual temp probes for the pit and the meat before you close the lid. Typically you’ll leave the bottom vent wide open until you approach your target temp. The top vent can stay open about 1 inch. It’s very important to adjust the vents well before your target temp. For instance, if you want to target 225, we recommend you adjust the bottom vent to about 1/4 inch once the pit temp hits 170. The temp will slowly ease into place and be easy to stabilize at your desired temp.
[…] Smoke at 225 to 250 with Apple wood and Hickory chips until internal temp hits 180-185. […]
[…] When you are ready, prepare your Primo for smoking. […]
[…] to wash off the cure and then soak it in cold water. At this point prepare the Primo for smoking and soak a few cups of apple and hickory […]
The Primo Quick Lights work great; with only one, the grill gets up to temp in 1/2 hr to 45 min. as quick or quicker than when I used a chimney with bricketts. And a real advantage of the Primo is the ability to control temperature. With experience, you learn to adjust the bottom damper and chimney cap to get and keep the temperature you want.
Kim you are patient! Lighting it in more than one spot will get the grill to temp much more quickly!
[…] These ribs have been brined and are ready to be rubbed. Before you rub, prepare the Primo for smoking and soak a few cups of apple, hickory, and/or cherry wood chips or chunks. You’ll want to […]
My previous comments praised the QuickLights. Tonight – not so good. We had a strong breeze and I consumed a full pack of matches trying to light a QuickLight. The ignitor flamed-up then blew out. After trying 3 separate QLs, I gave up on the normal lighting routine. But I did find the solution: Put the QL in the middle of a section of newspater; light the paper and the QL will ignite and then light the charcoal. So all was not lost; in fact, it was a good learning experience.
Kim- I would advocate using a lighter over matches- you can also light the quick light anywhere, not just the red ignitor area.
[…] you rub your chicken, prepare your Primo for smoking. We would recommend a 3 to 1 apple wood to hickory chip ratio for chicken – chicken can […]
[…] Grillers” from the Amish market. Simply soak a few handfuls of apple and hickory chips and prepare the Primo for smoking. Target a smoking temp of 250 or so. Let them smoke for 45 minutes or so and then turn them […]
[…] Prepare the Primo for smoking using the smoking wood of your choice- hickory, apple, cherry, oak & mesquite all work well for brisket. Also, unique to smoking brisket, we recommend placing pans of water on top of the ceramic d plates. Target a smoking temp of 250. […]
[…] ready, prepare your Primo for smoking. For turkey we would recommend a mix of apple and hickory chips- the turkey will only need a few […]
[…] Prepare the Primo for smoking. We would recommend using a couple cups of soaked apple, hickory or mesquite wood. Target a smoking temp of 250 or so. Rub well and smoke the beef for two hours. (you will have extra rub reserved) The chorizo will only need about an hour. Slice it on the bias into 1/4 thick pieces. Alternatively you can choose not to smoke the sausage- remove it from its casing and separate into bite size pieces to cook with the onions and garlic below. Once the meat is on the grill you can start to put together the chili. […]
[…] Prepare the Primo for smoking. For Pastrami we would recommend apple or cherry wood. Target a smoking temp of 250. Smoke for a few hours until internal temp is 160 to 165. […]
[…] Prepare the Primo for smoking and target a grill temp of 225 to 250. We would recommend a mix of apple and hickory. […]
[…] Prepare the Primo for smoking. We would recommend using a mix of apple and hickory for the ham. Target a smoking temp around 250 and smoke until ham temp is over 115 or so. […]
[…] the Primo for smoking. Target a smoking temp around 250 to start – we would recommend apple and or hickory chips. […]
[…] Prepare the Primo to use as a convection oven (use the ceramic deflector plates) and target a temperature of 350. Fill each foil pan with the butter poaching liquid. […]
[…] Prepare the Primo for direct grilling- target a temperature of at least 400- ok to be hotter if desired. Before you put the steak on brush off the garlic. […]
[…] Prepare the Primo for direct grilling. Prepare a butter sauce for basting- a tablespoon of butter per crab, an appropriate amount of Old Bay, and chopped scallions. When ready to grill gently pat dry the crabs and then top coat with the butter baste. […]
[…] Prepare the Primo for smoking. We recommend using only a handful of applewood chips. You can see we put on 2 jalapenos and an orange bell pepper to smoke/roast along with the shrimp. […]
I tried the propane torch method (same style as shown in the picture above), but the torch kept going out. I had the bottom vent open, so I’m guessing it is getting enough oxygen.
Matt,
Sometimes the torches can be fickle – give yourself an inch or so above the charcoal and if the torch is working it should light it easily and quickly.